Spring Boot之——整合数据库
数据源自动配置-HikariDataSource
目的:能够使用SpringBoot操作MySQL实现 CRUD 操作
步骤:
- 引入jdbc场景依赖
- 修改配置文件 application.yml
- 创建数据库表
- 创建对应的实体类
- 单元测试
实现:
1、新建工程,引入jdbc场景依赖
1 | <!--springboot工程需要继承的父工程--> |
2、创建引导类和配置文件 application.yml
1 | server: |
3、创建数据库表
1 | drop table if exists tb_user; |
4、创建对应的实体类
1 | package com.itheima.sh.pojo; |
5、单元测试
1 | package com.itheima.sh; |
小结:
jdbc自动化配置帮助我们做了什么?
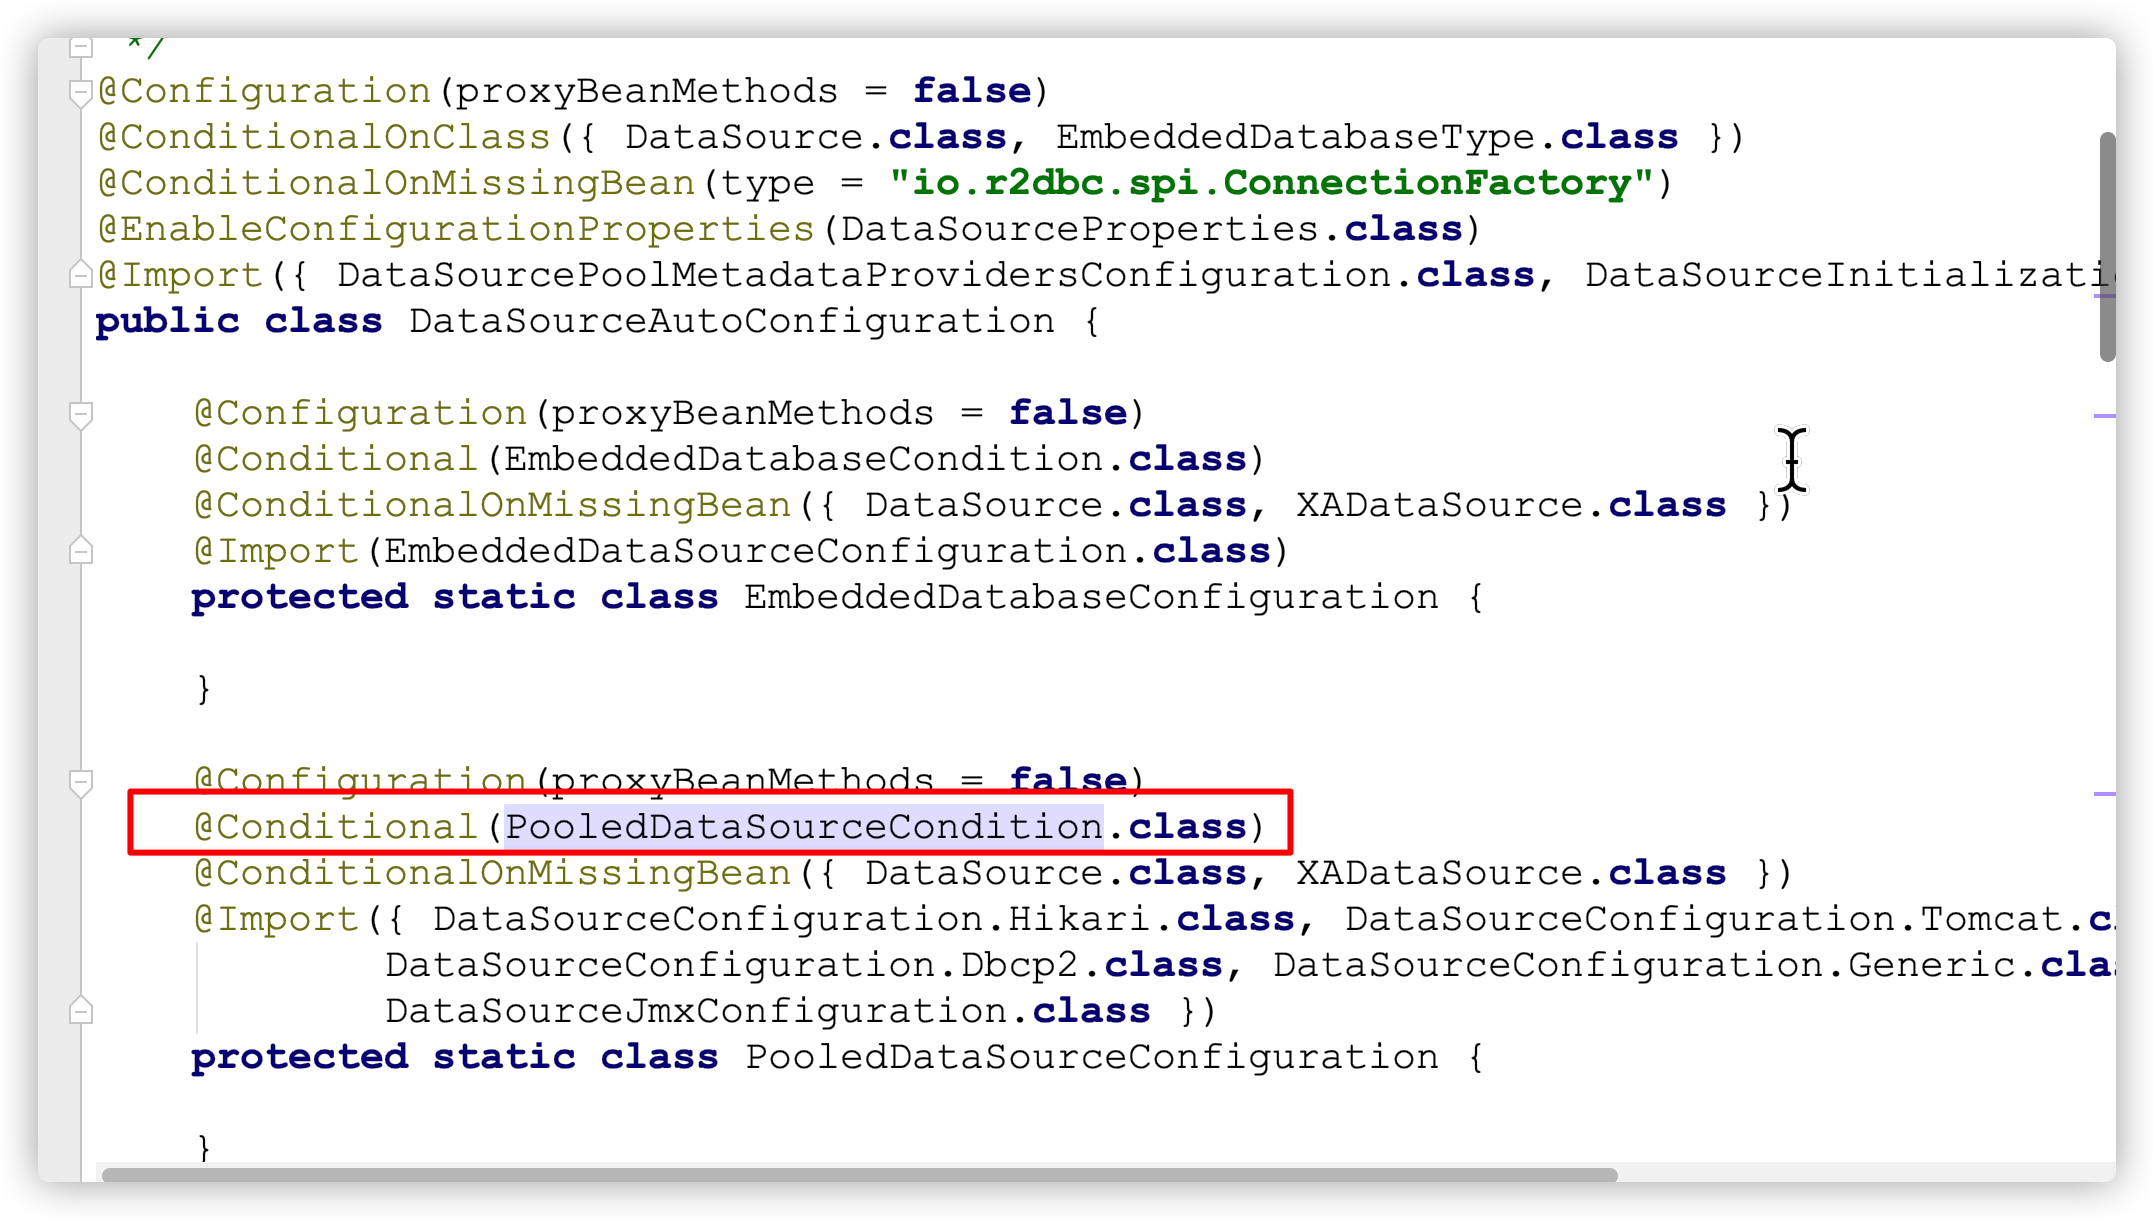
DataSourceAutoConfiguration : 数据源的自动配置
修改数据源相关的配置:spring.datasource
数据库连接池的配置,是自己容器中没有DataSource才自动配置的
底层配置好的连接池是:HikariDataSource
- DataSourceTransactionManagerAutoConfiguration: 事务管理器的自动配置
JdbcTemplateAutoConfiguration: JdbcTemplate的自动配置,可以来对数据库进行crud
- 可以修改这个配置项@ConfigurationProperties(prefix = “spring.jdbc”) 来修改JdbcTemplate
- @Bean@Primary JdbcTemplate;容器中有这个组件
- JndiDataSourceAutoConfiguration: jndi的自动配置
- XADataSourceAutoConfiguration: 分布式事务相关的
数据源切换为Druid
目的:能够切换数据库连接池为Druid,并完成相关高级配置
步骤:
- 依赖添加第三方Druid starter
- 修改配置文件 application.yml
实现:
1、依赖
1 | <dependency> |
2、配置文件
1 | server: |
参考官网
3、测试上面的测试类
小结:
druid starter为什么需要添加依赖版本?
帮助我们做了哪些自动化配置功能?
扩展配置项 spring.datasource.druid
DruidSpringAopConfiguration.class, 监控SpringBean的;配置项:spring.datasource.druid.aop-patterns
DruidStatViewServletConfiguration.class, 监控页的配置:spring.datasource.druid.stat-view-servlet;默认开启
DruidWebStatFilterConfiguration.class, web监控配置;spring.datasource.druid.web-stat-filter;默认开启
DruidFilterConfiguration.class}) 所有Druid自己filter的配置
其他配置:
参考官网介绍:https://github.com/alibaba/druid/wiki/%E5%B8%B8%E8%A7%81%E9%97%AE%E9%A2%98
Druid starter介绍:https://github.com/alibaba/druid/tree/master/druid-spring-boot-starter
整合MyBatis
目的:能独立完成SpringBoot整合Mybatis【重要】
步骤:
添加依赖
编写Mapper接口
在resources下创建
com/itheima/sh/mapper文件夹编写Controller测试/编写单元测试类
实现:
1、添加依赖,官网参考
1 | <dependency> |
2、编写Mapper接口
1 | package com.itheima.sh.mapper; |
3、在resources下创建 com/itheima/sh/mapper 文件夹
1 |
|
4、编写Controller测试/编写单元测试类
1 | package com.itheima.sh.controller; |
浏览器测试:http://localhost/user
我们发现 Mybatis的所有的配置是按照我们学习的默认规则,Mybatis starter 帮助我们做成了自动化配置,开发是不是越来越简单了。
全局配置文件
SqlSessionFactory: 自动配置好了
SqlSession:自动配置了 SqlSessionTemplate 组合了SqlSession
@Import(AutoConfiguredMapperScannerRegistrar.class);
Mapper: 只要写的操作MyBatis的接口标准**@Mapper 就会自动扫描进来**
完整截图:
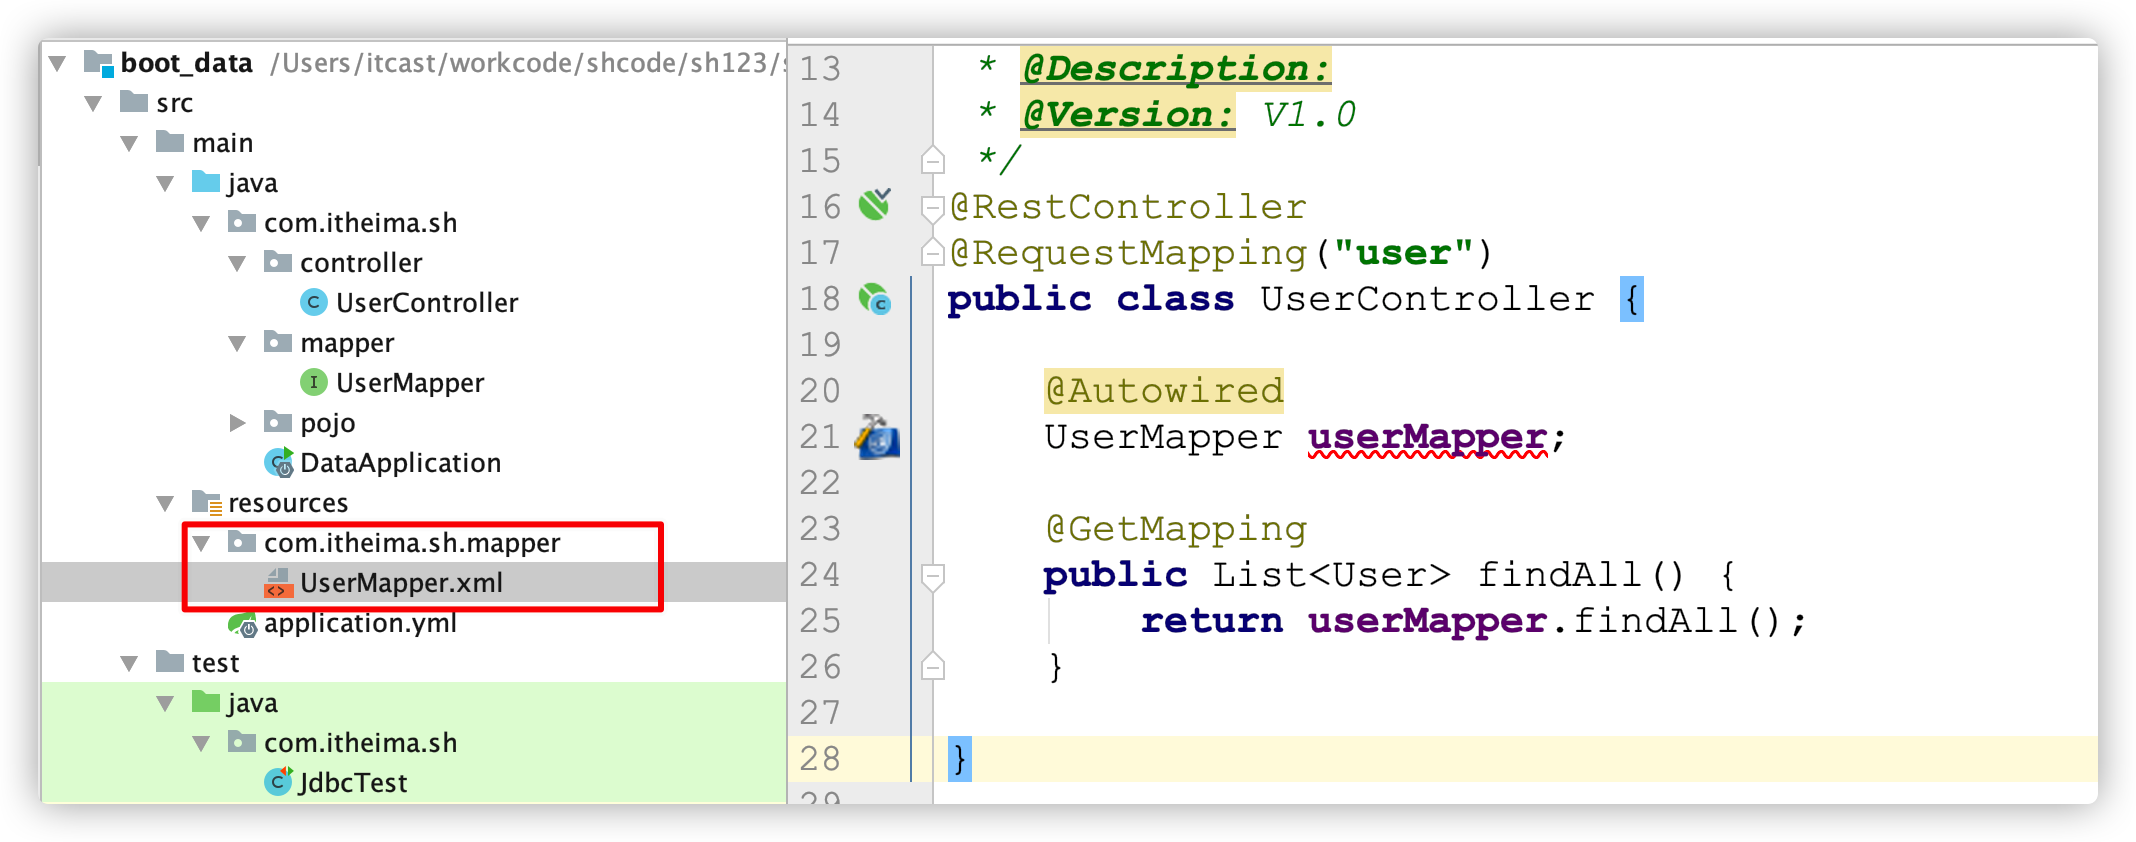
那么如果我改变了默认的配置会怎么样呢?
1、破坏Mapper配置文件存放的位置:
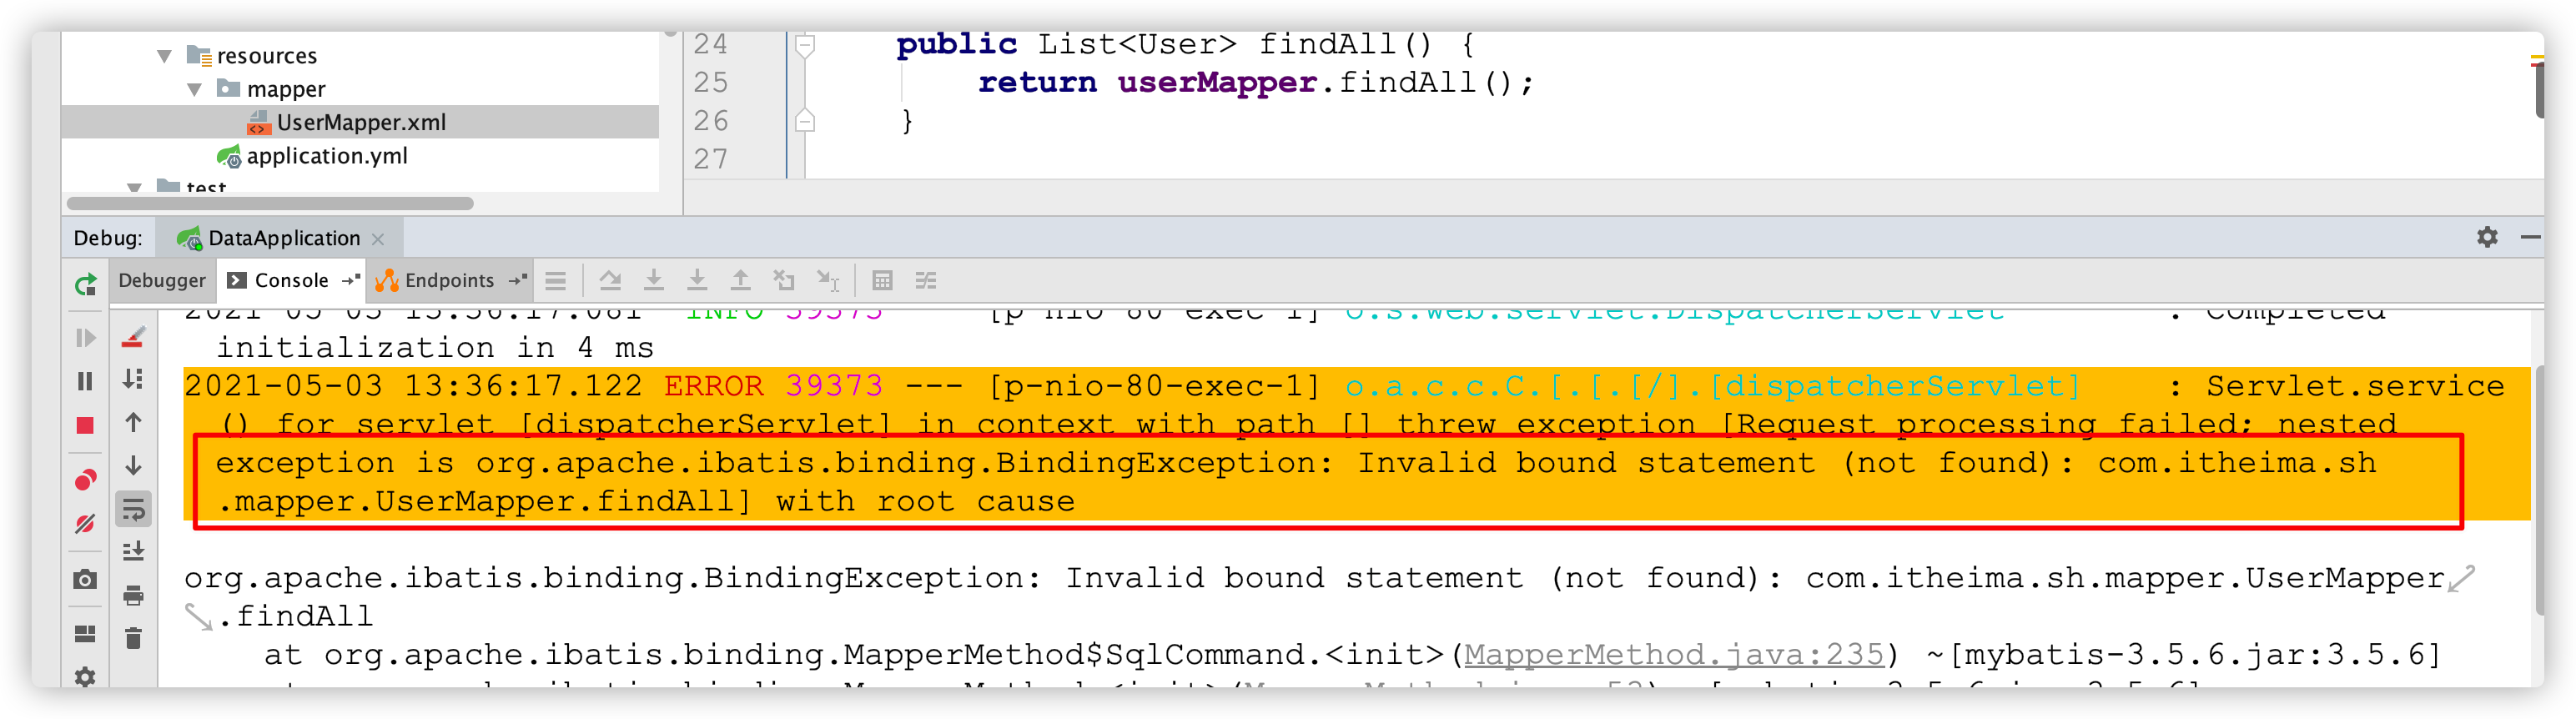
在 resources 路径下创建 mapper 文件夹,并且将UserMapper.xml放在mapper文件夹下:
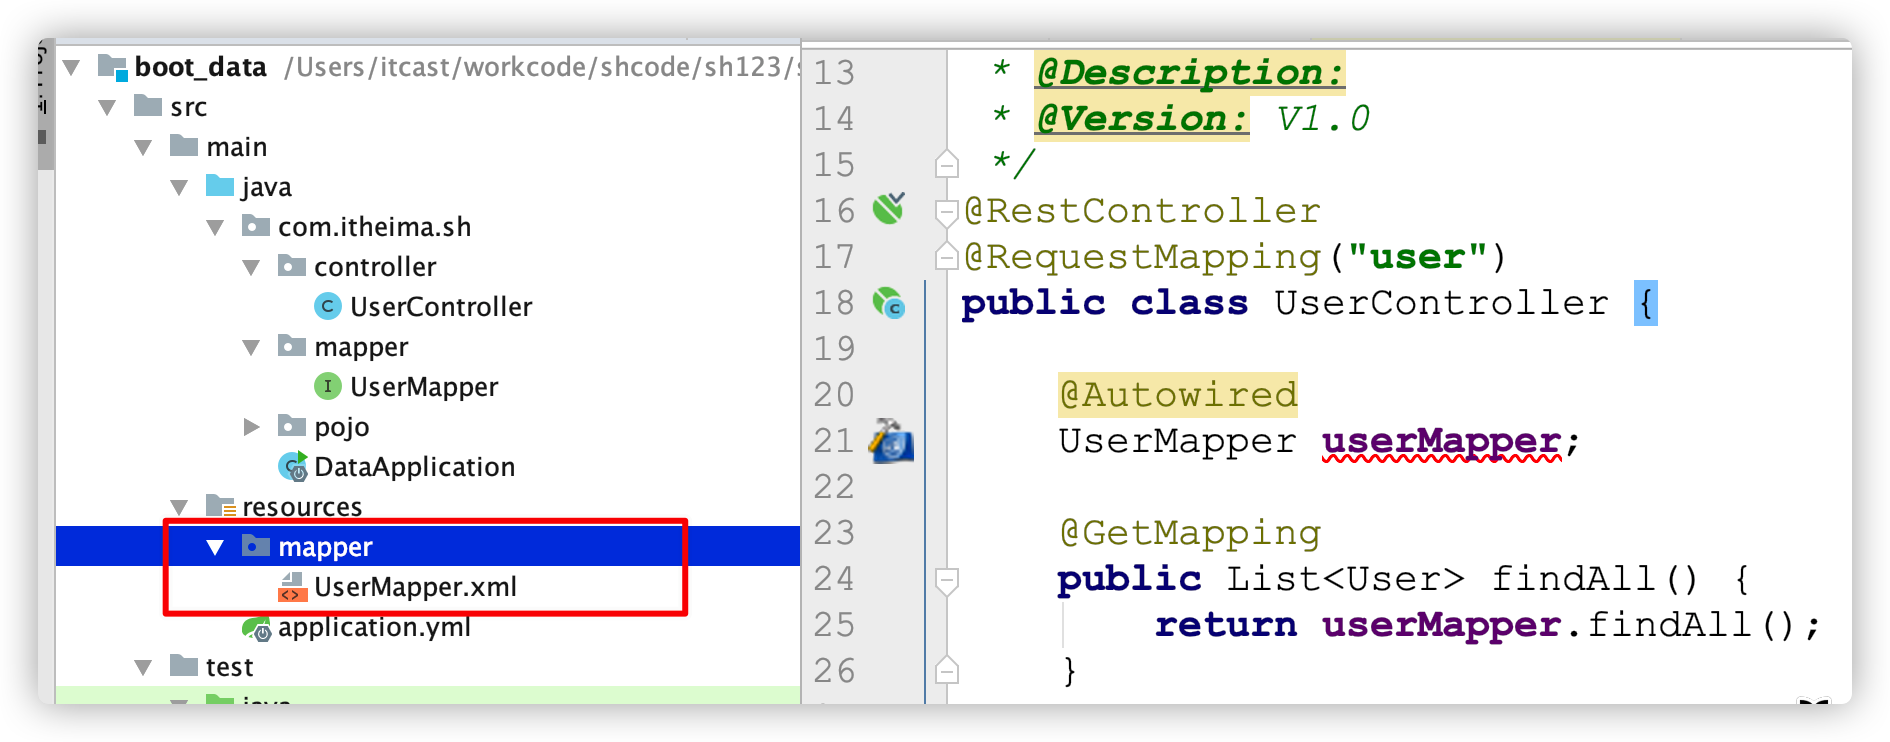
运行测试 访问浏览器,发现会出异常:
解决方案:在 application.yml 配置文件添加:
1 | mybatis: |
2、驼峰命名规范:
数据库表结构:

实体类: private String userName;
发现现象:

解决方案:在 application.yml 配置文件添加:
1 | mybatis: |
3、省略@Mapper注解:

启动项目,出现异常:
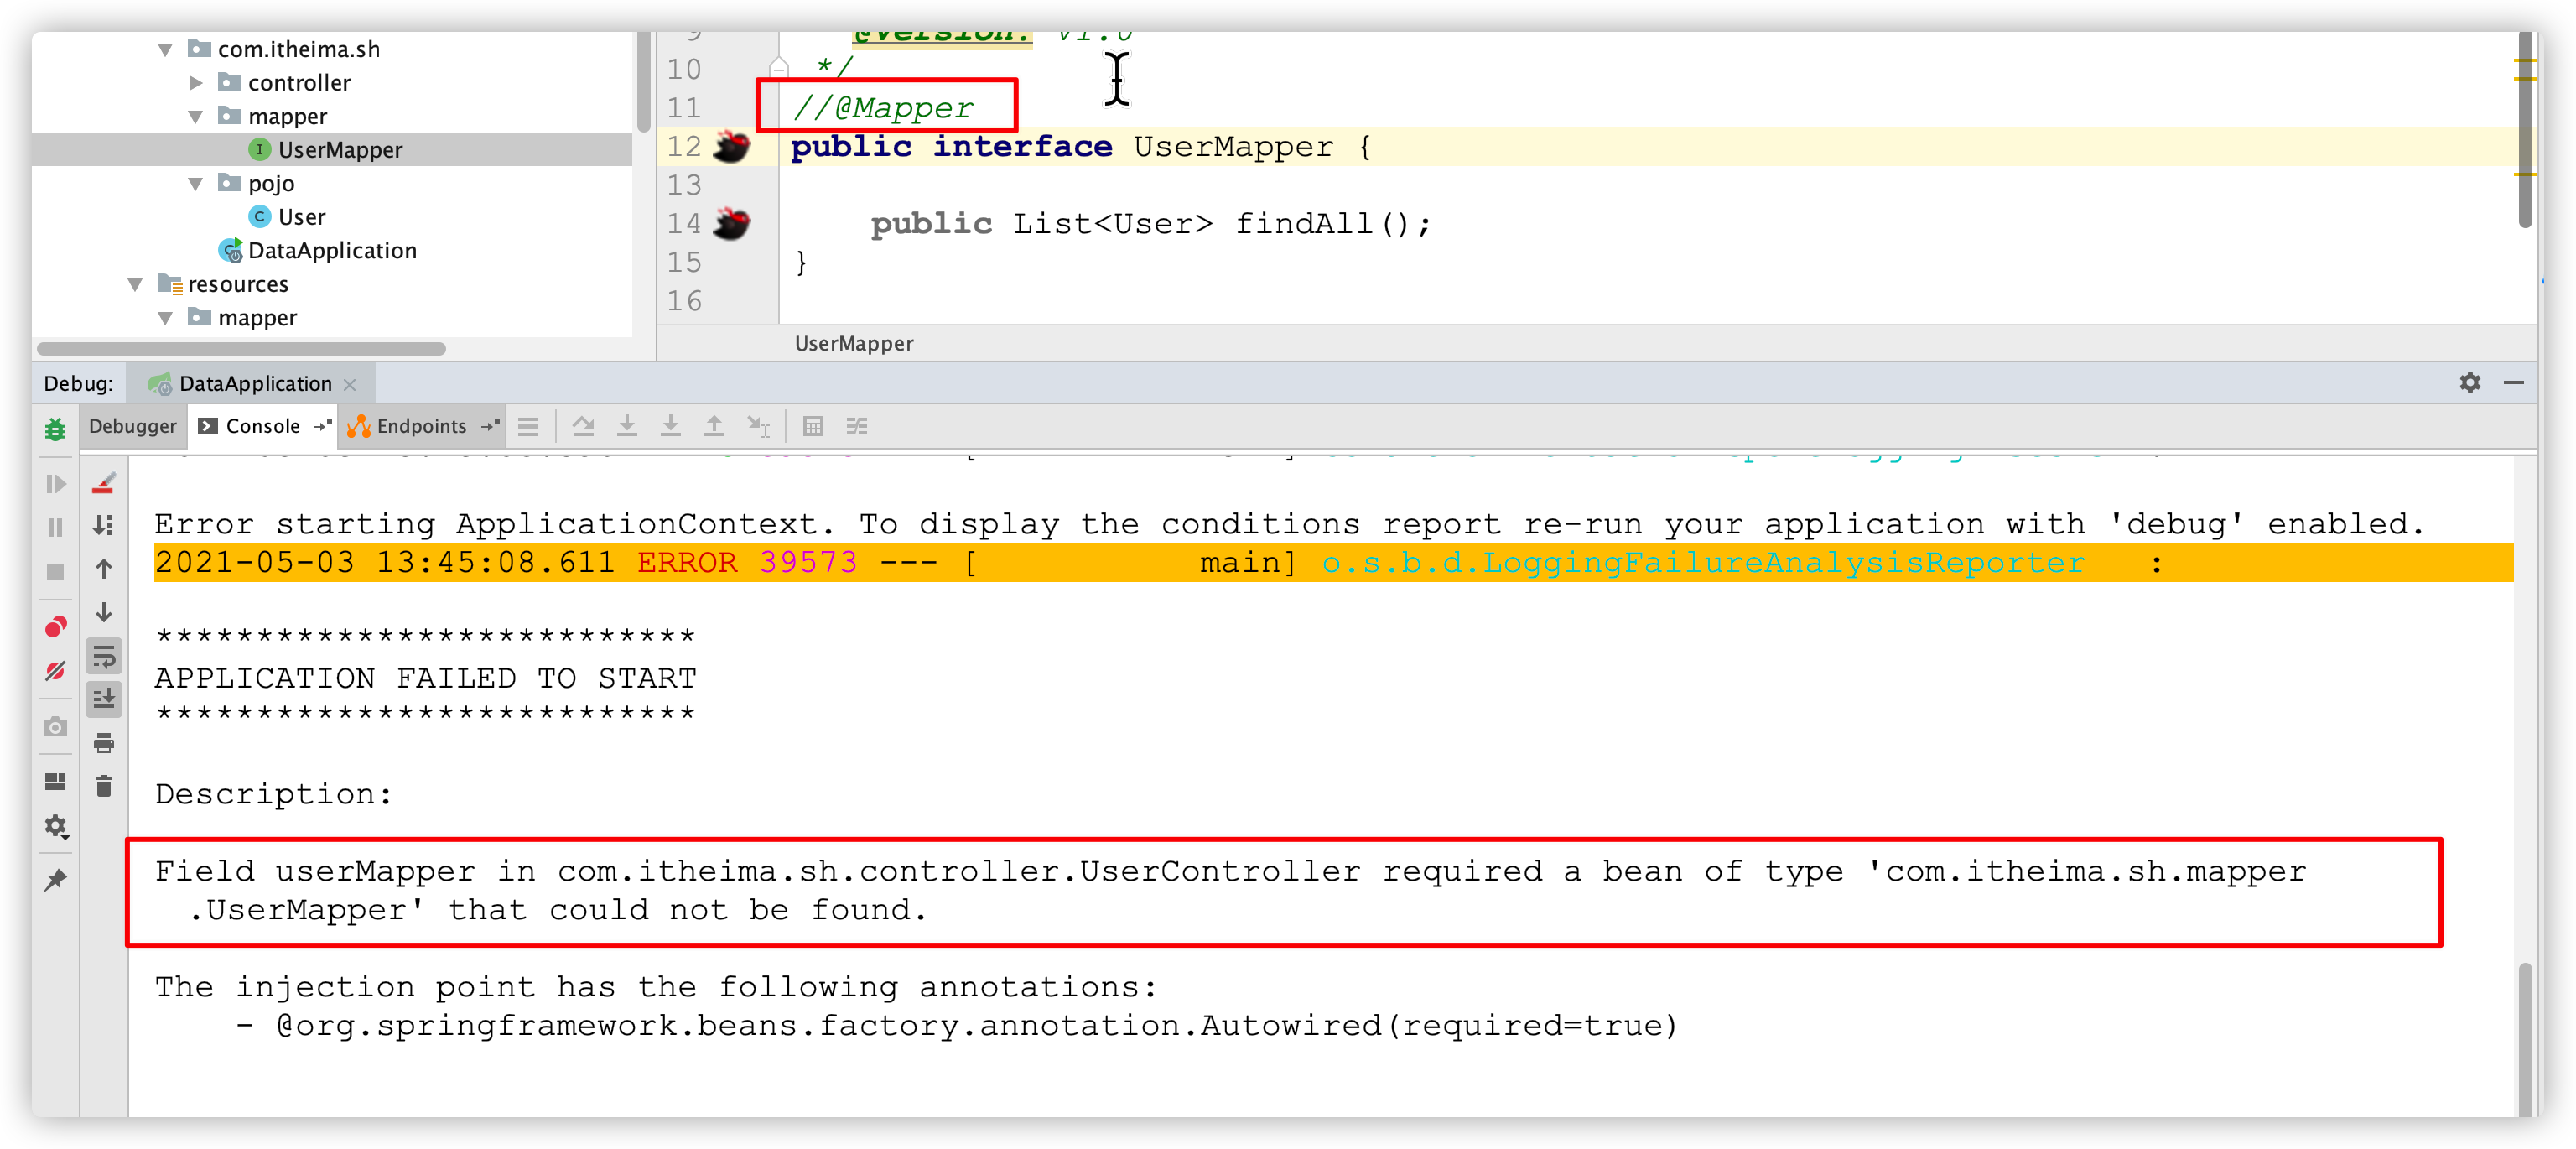
解决方案:在引导类上添加 @MapperScan 注解:

小结:
- 以上是项目中常用的内容,其他配置可以参考官网查看
整合Mybatis实现分页
目的:能够实现SpringBoot整合Mybatis完成分页功能
步骤:
1、依赖
1 | <dependency> |
2、配置
1 | pagehelper: |
实现:作业实现分页查询+CRUD
整合Redis
目的:能够独立使用SpringBoot整合Redis
步骤:
场景(redis)依赖
配置文件
配置类实现key和value序列化和反序列化(可选)
准备Redis
编写测试类
实现:
1、依赖
1 | <dependency> |
2、配置文件
1 | spring: |
3、配置类
1 | package com.itheima.sh.config; |
3、编写测试类(先启动Redis服务)
1 | package com.itheima.sh.controller; |