虽然之前已经学习了ElasticSearch的使用,但是依然有一些elasticsearch的高级搜索功能等待大家探索。我们今天就会挑选几个比较常用的来学习。
详细文档我们可以参考官方文档:
https://www.elastic.co/guide/en/elasticsearch/reference/7.x/index.html
1.0.安装Elasticsearch
建议所有同学使用我提供的镜像从新安装elasticsearch,我的版本是7.4.2
参考课前资料文档:
1.1.特殊数据类型
在之前的学习中,我们了解了Elasticsearch的基本数据类型,今天我们来看看ES中提供的特殊数据类型:
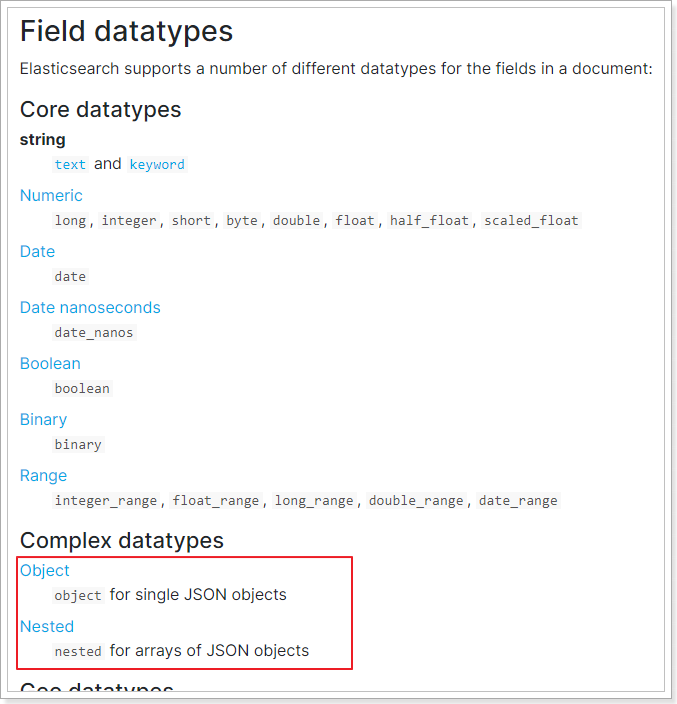
1.1.1.Object类型
相关文档:https://www.elastic.co/guide/en/elasticsearch/reference/7.6/object.html
当我们向ES中存入JSON数据时,大多数情况下,数据都是简单JSON类型,例如:
1
2
3
4
5
6
| PUT my_index/_doc/1
{
"region": "US",
"age": 30,
"name": "John Smith"
}
|
这样,写入ES的文档就包含3个字段,分别是:region、age、name
但是,如果我们存入ES的数据比较复杂,包含对象,例如:
1
2
3
4
5
6
7
8
9
| PUT my_index/_doc/1
{
"region": "US",
"age": 30,
"name": {
"first": "John",
"last": "Smith"
}
}
|
此时,写入ES的文档包含3个字段:
- region:普通字符串
- age:普通数字
- name:是一个内部嵌套的对象,包含两个属性:
因为Lucene是不支持对象数据的,因此ES会将数据扁平化处理,变成这样:
1
2
3
4
5
6
| {
"region": "US",
"age": 30,
"name.first": "John",
"name.last": "Smith"
}
|
此时,文档的映射类型(mapping)大概是这样的:
1
2
3
4
5
6
7
8
9
10
11
12
13
14
15
| PUT my_index
{
"mappings": {
"properties": {
"region": {"type": "keyword"},
"age": {"type": "integer" },
"name": {
"properties": {
"first": { "type": "text" },
"last": { "type": "text" }
}
}
}
}
}
|
此时,如果我们要根据名称做match搜索,我们需要这样:
1
2
3
4
5
6
7
8
| GET /my_index/_search
{
"query": {
"match": {
"name.first": "John"
}
}
}
|
1.1.2.nested类型
Nested类型其实是Object类型的一种特殊版本,它允许包含一组属性相似Object的数组中的每个对象,可以被独立的搜索,互不影响。
文档地址:https://www.elastic.co/guide/en/elasticsearch/reference/7.6/nested.html
1)Object数组的问题
我们先来看一个文档数据:
1
2
3
4
5
6
7
8
9
10
11
12
13
14
| PUT my_index/_doc/1
{
"group" : "fans",
"user" : [
{
"first" : "张",
"last" : "学有"
},
{
"first" : "刘",
"last" : "德华"
}
]
}
|
因为user是一个数组,而数组中是Object类型,因此此时Use会被认定为Object类型,然后会被展开,处理成这样:
1
2
3
4
5
| {
"group" : "fans",
"user.first" : [ "张", "刘" ],
"user.last" : [ "学有", "德华" ]
}
|
此时,user.first和user.last被处理成两个数组类型的字段,因此名字Alice和Smith之间的关联就丢失了。
当你搜索张德华时,也能搜索到数据,这显然是不对的。
我们试试:
1
2
3
4
5
6
7
8
9
10
11
| GET my_index/_search
{
"query": {
"bool": {
"must": [
{ "match": { "user.first": "张" }},
{ "match": { "user.last": "德华" }}
]
}
}
}
|
这个搜索时要搜first名称为张,last名称为德华的人,是不存在的,但是结果却搜索到了:
1
2
3
4
5
6
7
8
9
10
11
12
13
14
15
16
17
18
19
20
21
22
23
24
25
26
27
28
29
30
31
32
33
34
35
36
37
38
39
| {
"took" : 22,
"timed_out" : false,
"_shards" : {
"total" : 1,
"successful" : 1,
"skipped" : 0,
"failed" : 0
},
"hits" : {
"total" : {
"value" : 1,
"relation" : "eq"
},
"max_score" : 0.8630463,
"hits" : [
{
"_index" : "my_index",
"_type" : "_doc",
"_id" : "1",
"_score" : 0.8630463,
"_source" : {
"group" : "fans",
"user" : [
{
"first" : "张",
"last" : "学有"
},
{
"first" : "刘",
"last" : "德华"
}
]
}
}
]
}
}
|
2)Nested解决Object数组问题
如果你想要使用对象数组格式,同时又想保持数组中每个Object的独立性。那么你应该使用nested类型。nested类型会把数组中的每个object用隐式的独立Document来保存,因此可以互不干扰的查询,但必须用nested方式查询。
首先,我们设置一个nested类型的字段:
1
2
3
4
5
6
7
8
9
10
11
12
13
14
| PUT my_index
{
"mappings": {
"properties": {
"user": {
"type": "nested",
"properties": {
"first":{"type":"keyword"},
"last":{"type":"keyword"}
}
}
}
}
}
|
然后,再次填充数据:
1
2
3
4
5
6
7
8
9
10
11
12
13
14
| PUT my_index/_doc/1
{
"group" : "fans",
"user" : [
{
"first" : "张",
"last" : "学有"
},
{
"first" : "刘",
"last" : "德华"
}
]
}
|
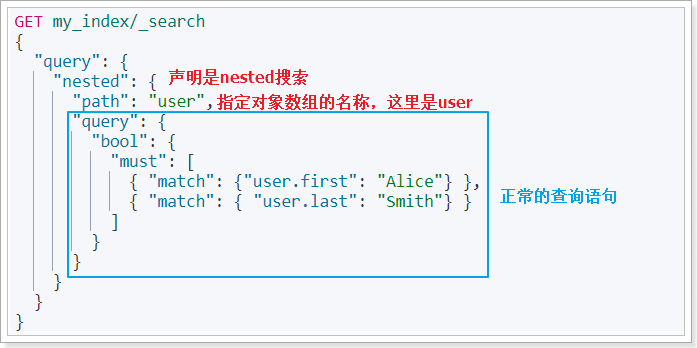
搜索的时候,必须使用nested搜索,并制定对象的名称:
1
2
3
4
5
6
7
8
9
10
11
12
13
14
15
16
17
18
19
20
21
22
23
24
| GET my_index/_search
{
"query": {
"nested": {
"path": "user",
"query": {
"bool": {
"must": [
{
"match": {
"user.first": "刘"
}
},
{
"match": {
"user.last": "德华"
}
}
]
}
}
}
}
}
|
语法说明:
这次就搜索不到数据了,因为没有名为Alice Smith的人。
1
2
3
4
5
6
7
8
9
10
11
12
13
14
15
16
17
18
| {
"took" : 0,
"timed_out" : false,
"_shards" : {
"total" : 1,
"successful" : 1,
"skipped" : 0,
"failed" : 0
},
"hits" : {
"total" : {
"value" : 0,
"relation" : "eq"
},
"max_score" : null,
"hits" : [ ]
}
}
|
1.2.自动补全和提示
ES的推荐功能(Suggester)包含三种不同方式,不过用的最多的,还是Completion模式,实现自动补全和基于上下文的提示功能。
相关文档:https://www.elastic.co/guide/en/elasticsearch/reference/7.6/search-suggesters.html#completion-suggester
1.2.1.准备数据
理想中,自动补全功能需要在用户键入一个字符时,尽可能快速的给用户返回提示信息。因此自动补全很注重查询的速度。为了提高suggester的速度,相关的数据必须在内存中缓存起来,数据的类型也不再是普通类型,而是completion类型。
首先我们要定义一个索引库,并设置用于自动补全的字段为completion类型。
1
2
3
4
5
6
7
8
9
10
| PUT articles
{
"mappings": {
"properties": {
"suggestion":{
"type": "completion"
}
}
}
}
|
创建一个名为articles的索引库,并且有一个字段为suggestion,类型是completion
然后批量插入一些数据:
1
2
3
4
5
6
7
8
9
10
11
| POST articles/_bulk
{ "index" : { } }
{ "suggestion": ["lucene", "is", "very", "cool"]}
{ "index" : { } }
{ "suggestion": ["Elasticsearch", "builds", "on", "lucene"]}
{ "index" : { } }
{ "suggestion": ["Elasticsearch", "rocks"]}
{ "index" : { } }
{ "suggestion": ["elastic", "is", "the", "company", "behind", "ELK"]}
{ "index" : { } }
{ "suggestion": ["Elk", "stack", "rocks"]}
|
在一个文档中,completion类型的字段,其值可以有多个,它的每一个值都可以成为自动补全的推荐结果。
1.2.2.查询推荐值
如果我们要为用户输入的字符补全完整字符,可以向ES发起请求,指定要在哪个completion类型的字段上进行查询,示例:
1
2
3
4
5
6
7
8
9
10
11
12
| POST articles/_search
{
"suggest": {
"article-suggester": {
"prefix": "el ",
"completion": {
"field": "suggestion",
"size": 10
}
}
}
}
|
参数说明:
- suggest:代表接下来的查询是一个suggest类型的查询
- article-suggester:这次查询的名称,自定义
- prefix:用来补全的词语前缀,本例中搜索以 el开头的内容
- completion:代表是completion类型的suggest,其它类型还有:Term、Phrase
1.2.3.推荐结果
上面的查询返回结果如下:
1
2
3
4
5
6
7
8
9
10
11
12
13
14
15
16
17
18
19
20
21
22
23
24
25
26
27
28
29
30
31
32
33
34
35
36
37
38
39
40
41
42
43
44
45
46
47
48
49
50
51
52
53
54
55
56
57
58
59
60
61
62
63
64
65
66
67
68
69
70
71
72
73
74
75
76
77
78
79
80
81
82
83
84
85
86
87
88
89
| {
"took" : 0,
"timed_out" : false,
"_shards" : {
"total" : 1,
"successful" : 1,
"skipped" : 0,
"failed" : 0
},
"hits" : {
"total" : {
"value" : 0,
"relation" : "eq"
},
"max_score" : null,
"hits" : [ ]
},
"suggest" : {
"article-suggester" : [
{
"text" : "el",
"offset" : 0,
"length" : 2,
"options" : [
{
"text" : "Elasticsearch",
"_index" : "articles",
"_type" : "_doc",
"_id" : "ZvxiWHABGZL7VTV2dPvC",
"_score" : 1.0,
"_source" : {
"suggestion" : [
"Elasticsearch",
"builds",
"on",
"lucene"
]
}
},
{
"text" : "Elasticsearch",
"_index" : "articles",
"_type" : "_doc",
"_id" : "Z_xiWHABGZL7VTV2dPvC",
"_score" : 1.0,
"_source" : {
"suggestion" : [
"Elasticsearch",
"rocks"
]
}
},
{
"text" : "Elk",
"_index" : "articles",
"_type" : "_doc",
"_id" : "afxiWHABGZL7VTV2dPvC",
"_score" : 1.0,
"_source" : {
"suggestion" : [
"Elk",
"stack",
"rocks"
]
}
},
{
"text" : "elastic",
"_index" : "articles",
"_type" : "_doc",
"_id" : "aPxiWHABGZL7VTV2dPvC",
"_score" : 1.0,
"_source" : {
"suggestion" : [
"elastic",
"is",
"the",
"company",
"behind",
"ELK"
]
}
}
]
}
]
}
}
|
返回结果中的options数组就是推荐的结果,其中text是推荐的文本,_source是文档原始数据。
本例中有四条推荐结果:
Elasticsearch,文档的内容是:”Elasticsearch”, “builds”, “on”, “lucene”Elasticsearch,文档的内容是:”Elasticsearch”, “rocks”ELK,文档内容是:”Elk”, “stack”, “rocks”elastic,文档内容是:”elastic is the company behind ELK stack”
1.3.拼音搜索
拼音搜索的关键是汉字与拼音的转换,只要找到这样的elasticsearch插件就可以了。在GitHub上恰好有这样的拼音插件。地址:https://github.com/medcl/elasticsearch-analysis-pinyin
1.3.1.安装拼音插件
首先下载ES版本对应的拼音插件。在GitHub页面中找到releases:https://github.com/medcl/elasticsearch-analysis-pinyin/releases
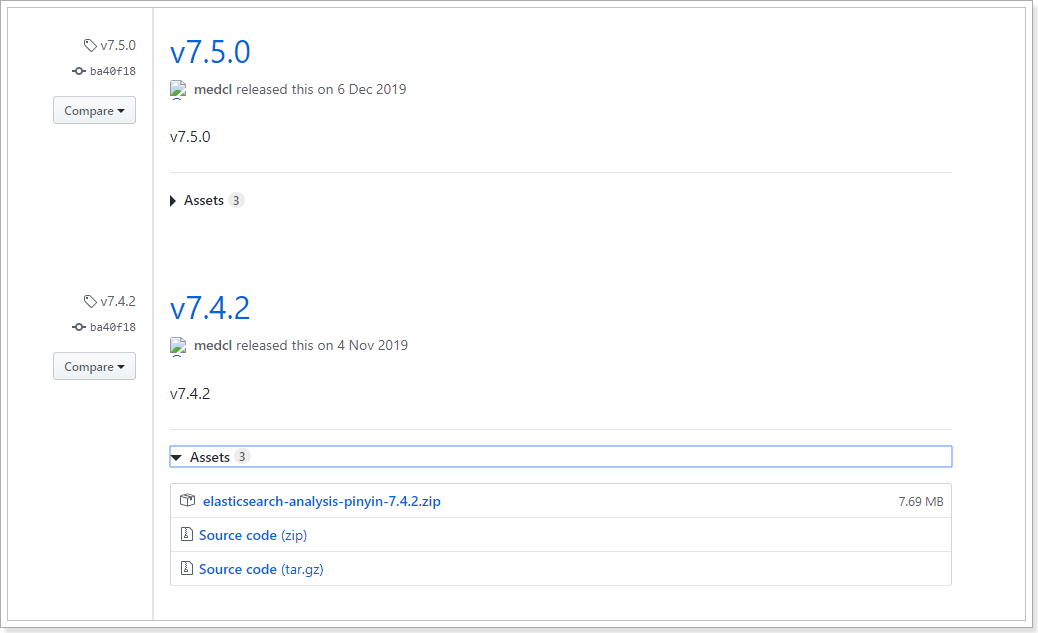
当然,课前资料提供的也有:
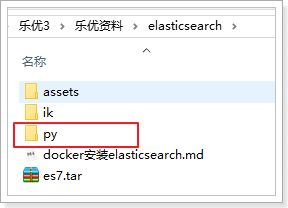
与安装IK分词器一样,把这个拷贝到${ES_HOME}/plugins/即可。
${ES_HOME}:elasticsearch的安装目录,如果你使用了Docker安装,请找到你的plugins挂载的目录
1
| cd /var/lib/docker/volumes/es-plugins/_data
|
我的目录如图:
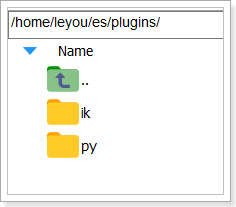
然后重启你的elasticsearch即可。
1.3.2.测试
在kibana中,输入命令测试:
1
2
3
4
5
| POST _analyze
{
"text": ["张学友", "刘德华"],
"analyzer": "pinyin"
}
|
结果:
1
2
3
4
5
6
7
8
9
10
11
12
13
14
15
16
17
18
19
20
21
22
23
24
25
26
27
28
29
30
31
32
33
34
35
36
37
38
39
40
41
42
43
44
45
46
47
48
49
50
51
52
53
54
55
56
57
58
59
60
| {
"tokens" : [
{
"token" : "zhang",
"start_offset" : 0,
"end_offset" : 0,
"type" : "word",
"position" : 0
},
{
"token" : "zxy",
"start_offset" : 0,
"end_offset" : 0,
"type" : "word",
"position" : 0
},
{
"token" : "xue",
"start_offset" : 0,
"end_offset" : 0,
"type" : "word",
"position" : 1
},
{
"token" : "you",
"start_offset" : 0,
"end_offset" : 0,
"type" : "word",
"position" : 2
},
{
"token" : "liu",
"start_offset" : 1,
"end_offset" : 1,
"type" : "word",
"position" : 3
},
{
"token" : "ldh",
"start_offset" : 1,
"end_offset" : 1,
"type" : "word",
"position" : 3
},
{
"token" : "de",
"start_offset" : 1,
"end_offset" : 1,
"type" : "word",
"position" : 4
},
{
"token" : "hua",
"start_offset" : 1,
"end_offset" : 1,
"type" : "word",
"position" : 5
}
]
}
|
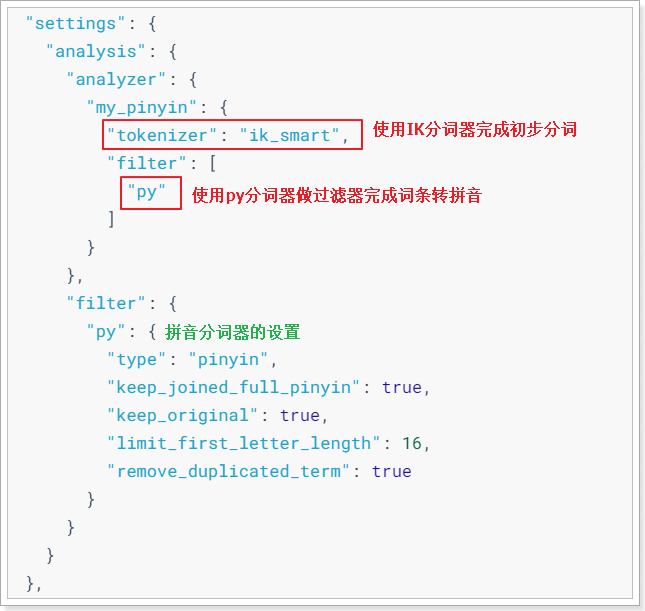
1.3.3.组合分词器
在分词处理时,会用到analyzer,我们以前称它为分词器。但其实它叫分析器,一般包含两部分:
- Tokenizer:分词器,对文本内容分词,得到词条Term
- filter:过滤器,对分好的词条做进一步处理,例如拼音转换、同义词转换等
我们可以把各种下载的分词插件组合,作为tokenizer或者filter,来完成自定义分词效果。
示例:
1
2
3
4
5
6
7
8
9
10
11
12
13
14
15
16
17
18
19
20
21
22
23
24
25
26
27
28
29
30
31
32
33
34
35
36
37
38
39
40
41
42
43
44
45
| PUT /goods
{
"settings": {
"analysis": {
"analyzer": {
"my_pinyin": {
"tokenizer": "ik_smart",
"filter": [
"py"
]
}
},
"filter": {
"py": {
"type": "pinyin",
"keep_full_pinyin": false,
"keep_joined_full_pinyin": true,
"keep_original": true,
"limit_first_letter_length": 16,
"remove_duplicated_term": true
}
}
}
},
"mappings": {
"properties": {
"id": {
"type": "keyword"
},
"name": {
"type": "completion",
"analyzer": "my_pinyin",
"search_analyzer": "ik_smart"
},
"title":{
"type": "text",
"analyzer": "my_pinyin",
"search_analyzer": "ik_smart"
},
"price":{
"type": "long"
}
}
}
}
|
说明:
1.3.4.测试自定义分词器
我们在kibana中运行测试,看看分词效果:
1
2
3
4
5
| POST /goods/_analyze
{
"text": "你好,华为",
"analyzer": "my_pinyin"
}
|
结果:
1
2
3
4
5
6
7
8
9
10
11
12
13
14
15
16
17
18
19
20
21
22
23
24
25
26
27
28
29
30
31
32
33
34
35
36
37
38
39
40
41
42
43
44
45
46
| {
"tokens" : [
{
"token" : "你好",
"start_offset" : 0,
"end_offset" : 2,
"type" : "CN_WORD",
"position" : 0
},
{
"token" : "nihao",
"start_offset" : 0,
"end_offset" : 2,
"type" : "CN_WORD",
"position" : 0
},
{
"token" : "nh",
"start_offset" : 0,
"end_offset" : 2,
"type" : "CN_WORD",
"position" : 0
},
{
"token" : "华为",
"start_offset" : 3,
"end_offset" : 5,
"type" : "CN_WORD",
"position" : 1
},
{
"token" : "huawei",
"start_offset" : 3,
"end_offset" : 5,
"type" : "CN_WORD",
"position" : 1
},
{
"token" : "hw",
"start_offset" : 3,
"end_offset" : 5,
"type" : "CN_WORD",
"position" : 1
}
]
}
|
1.3.5.测试拼音补全
一旦有了拼音分词器,尽管用户使用拼音,我们也能完成自动补全了。
先插入一部分数据:
1
2
3
4
5
6
7
8
9
| PUT /goods/_bulk
{ "index" : {"_id":1 } }
{ "id": 1, "name": "手机","title":"小米手机"}
{ "index" : {"_id":2 } }
{"id": 2,"name": "空调","title":"小米空调"}
{ "index" : {"_id":3 } }
{"id": 3,"name": "sony","title":"sony播放器"}
{ "index" : {"_id":4 } }
{"id": 4,"name": "松下","title":"松下电视"}
|
然后来一个自动补全的查询:
1
2
3
4
5
6
7
8
9
10
11
| POST /goods/_search
{
"suggest": {
"name_suggest": {
"prefix": "s",
"completion": {
"field": "name"
}
}
}
}
|
注意,我们输入的关键字是字母:s
看结果:
1
2
3
4
5
6
7
8
9
10
11
12
13
14
15
16
17
18
19
20
21
22
23
24
25
26
27
28
29
30
31
32
33
34
35
36
37
38
39
40
41
42
43
44
45
46
47
48
49
50
51
52
53
54
55
56
57
58
59
60
61
62
63
64
65
66
| {
"took" : 2,
"timed_out" : false,
"_shards" : {
"total" : 1,
"successful" : 1,
"skipped" : 0,
"failed" : 0
},
"hits" : {
"total" : {
"value" : 0,
"relation" : "eq"
},
"max_score" : null,
"hits" : [ ]
},
"suggest" : {
"name_suggest" : [
{
"text" : "s",
"offset" : 0,
"length" : 1,
"options" : [
{
"text" : "sony",
"_index" : "goods",
"_type" : "_doc",
"_id" : "3",
"_score" : 1.0,
"_source" : {
"id" : 3,
"name" : "sony",
"title" : "sony播放器"
}
},
{
"text" : "手机",
"_index" : "goods",
"_type" : "_doc",
"_id" : "1",
"_score" : 1.0,
"_source" : {
"id" : 1,
"name" : "手机",
"title" : "小米手机"
}
},
{
"text" : "松下",
"_index" : "goods",
"_type" : "_doc",
"_id" : "4",
"_score" : 1.0,
"_source" : {
"id" : 4,
"name" : "松下",
"title" : "松下电视"
}
}
]
}
]
}
}
|
返回的提示包括:sony、松下、手机,都是以s开头,是不是很酷炫呢!
2.RestAPI
ES提供的Java客户端包括两种:
在elasticsearch官网中提供了各种语言的客户端:https://www.elastic.co/guide/en/elasticsearch/client/index.html
而Java的客户端就有两个:

不过Java API这个客户端(Transport Client)已经在7.0以后过期了,而且在8.0版本中将直接废弃。所以我们会学习Java REST Client:
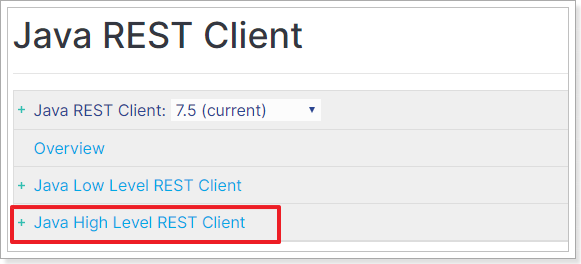
然后再选择High Level REST Client这个。
2.1.初始化
2.1.1.引入依赖
创建一个新的maven工程,并在pom 文件中引入下列依赖:
1
2
3
4
5
6
7
8
9
10
11
12
13
14
15
16
17
18
19
20
21
22
23
24
25
26
27
28
29
30
31
32
33
34
35
36
37
38
39
40
41
42
43
44
45
46
47
48
49
50
51
52
| <dependencies>
<dependency>
<groupId>junit</groupId>
<artifactId>junit</artifactId>
<version>4.12</version>
</dependency>
<dependency>
<groupId>org.elasticsearch.client</groupId>
<artifactId>elasticsearch-rest-high-level-client</artifactId>
<version>7.4.2</version>
</dependency>
<dependency>
<groupId>org.projectlombok</groupId>
<artifactId>lombok</artifactId>
<version>1.18.8</version>
</dependency>
<dependency>
<groupId>com.alibaba</groupId>
<artifactId>fastjson</artifactId>
<version>1.2.49</version>
</dependency>
<dependency>
<groupId>org.apache.commons</groupId>
<artifactId>commons-lang3</artifactId>
<version>3.8.1</version>
</dependency>
<dependency>
<groupId>org.apache.logging.log4j</groupId>
<artifactId>log4j-core</artifactId>
<version>2.11.2</version>
</dependency>
</dependencies>
<build>
<plugins>
<plugin>
<groupId>org.apache.maven.plugins</groupId>
<artifactId>maven-compiler-plugin</artifactId>
<version>3.2</version>
<configuration>
<source>1.8</source>
<target>1.8</target>
<encoding>UTF-8</encoding>
</configuration>
</plugin>
</plugins>
</build>
|
并在resources中新建文件:log4j2.xml,内容如下:
1
2
3
4
5
6
7
8
9
10
11
12
13
| <?xml version="1.0" encoding="UTF-8"?>
<Configuration status="WARN">
<Appenders>
<Console name="Console" target="SYSTEM_OUT">
<PatternLayout pattern="%d{HH:mm:ss.SSS} [%t] %-5level %logger{36} - %msg%n"/>
</Console>
</Appenders>
<Loggers>
<Root level="error">
<AppenderRef ref="Console"/>
</Root>
</Loggers>
</Configuration>
|
2.1.2.创建ES的客户端
在官网上可以看到连接ES的初始化教程:https://www.elastic.co/guide/en/elasticsearch/client/java-rest/current/java-rest-high-getting-started-initialization.html
首先需要与ES建立连接,ES提供了一个客户端RestHighLevelClient。
代码如下:
1
2
3
4
5
| RestHighLevelClient client = new RestHighLevelClient(
RestClient.builder(
new HttpHost("192.168.206.99", 9200, "http")
)
);
|
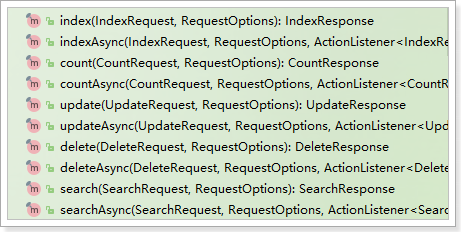
ES中的所有操作都是通过RestHighLevelClient来完成的:
为了后面测试方便,我们写到一个单元测试中,并且通过@Before注解来初始化客户端连接。
1
2
3
4
5
6
7
8
9
10
11
12
13
14
15
16
17
18
19
20
21
22
23
24
| public class ElasticDemo {
private RestHighLevelClient client;
@Before
public void init() throws IOException {
client = new RestHighLevelClient(
RestClient.builder(
new HttpHost("192.168.206.99", 9200, "http")
)
);
}
@After
public void close() throws IOException {
client.close();
}
}
|
2.1.3.准备实体类
索引库的CRUD需要用一个实体类来封装数据,我们准备一个实体类Goods:
1
2
3
4
5
6
7
8
9
10
11
12
13
14
15
16
| package cn.itcast.demo.pojo;
import lombok.AllArgsConstructor;
import lombok.Data;
import lombok.NoArgsConstructor;
@AllArgsConstructor
@NoArgsConstructor
@Data
public class Goods {
private Long id;
private String name;
private String title;
private Long price;
}
|
2.2.创建库和映射
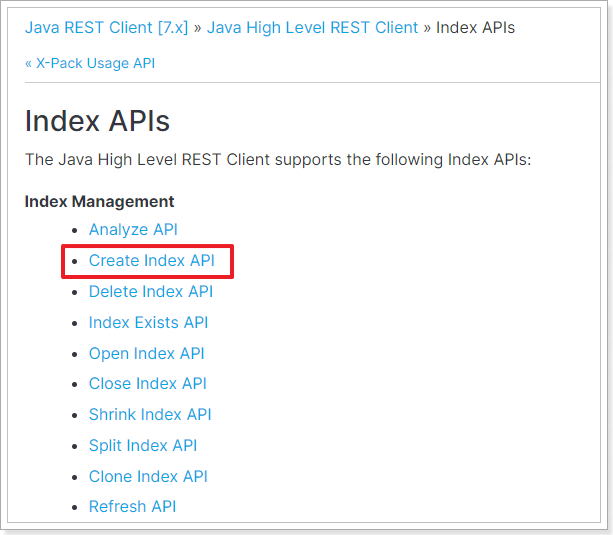
开发中,往往库和映射的操作一起完成,官网详细文档地址:https://www.elastic.co/guide/en/elasticsearch/client/java-rest/7.x/_index_apis.html
这里我们主要实现库和映射的创建。查询、删除等功能大家可参考文档自己实现。
2.2.1.思路分析
按照官网给出的步骤,创建索引包括下面几个步骤:
- 1)创建CreateIndexRequest对象,并指定索引库名称
- 2)指定settings配置
- 3)指定mapping配置
- 4)发起请求,得到响应
其实仔细分析,与我们在Kibana中的Rest风格API完全一致:
1
2
3
4
5
6
7
8
9
10
| PUT /heima
{
"settings": {
"number_of_shards": 3,
"number_of_replicas": 1
},
"mappings": {
}
}
|
2.2.2.设计映射规则
Java代码中设置mapping,依然与REST中一致,需要JSON风格的映射规则。因此我们先在kibana中给Goods实体类定义好映射规则。
Goods包括下面的字段:
- Id:主键,在ES中是唯一标示
- name:商品的名称,字符串类型,不需要分词,将来可以用作自动补全功能
- title:商品标题,字符串类型,可以分词
- price:价格,数值类型
映射如下:
1
2
3
4
5
6
7
8
9
10
11
12
13
14
15
16
17
18
19
20
21
22
23
24
25
26
27
28
29
30
31
32
33
34
35
36
37
38
39
40
41
42
43
44
45
| PUT /goods
{
"settings": {
"analysis": {
"analyzer": {
"my_pinyin": {
"tokenizer": "ik_smart",
"filter": [
"py"
]
}
},
"filter": {
"py": {
"type": "pinyin",
"keep_full_pinyin": false,
"keep_joined_full_pinyin": true,
"keep_original": true,
"limit_first_letter_length": 16,
"remove_duplicated_term": true
}
}
}
},
"mappings": {
"properties": {
"id": {
"type": "keyword"
},
"name": {
"type": "completion",
"analyzer": "my_pinyin",
"search_analyzer": "ik_smart"
},
"title":{
"type": "text",
"analyzer": "my_pinyin",
"search_analyzer": "ik_smart"
},
"price":{
"type": "long"
}
}
}
}
|
2.2.3.代码实现
我们在上面新建的ElasticDemo类中新建单元测试,完成代码,思路就是之前分析的4步骤:
- 1)创建CreateIndexRequest对象,并指定索引库名称
- 2)指定settings配置
- 3)指定mapping配置
- 4)发起请求,得到响应
运行之前,不要忘了删除以前的Goods索引库!!
运行之前,不要忘了删除以前的Goods索引库!!
1
2
3
4
5
6
7
8
9
10
11
12
13
14
15
16
17
18
19
20
21
22
23
24
25
26
27
28
29
30
31
32
33
34
35
36
37
38
39
40
41
42
43
44
45
46
47
48
49
50
51
52
53
54
| @Test
public void testCreateIndex() throws IOException {
CreateIndexRequest request = new CreateIndexRequest("goods");
request.source("{\n" +
" \"settings\": {\n" +
" \"analysis\": {\n" +
" \"analyzer\": {\n" +
" \"my_pinyin\": {\n" +
" \"tokenizer\": \"ik_smart\",\n" +
" \"filter\": [\n" +
" \"py\"\n" +
" ]\n" +
" }\n" +
" },\n" +
" \"filter\": {\n" +
" \"py\": {\n" +
" \"type\": \"pinyin\",\n" +
" \"keep_full_pinyin\": false,\n" +
" \"keep_joined_full_pinyin\": true,\n" +
" \"keep_original\": true,\n" +
" \"limit_first_letter_length\": 16,\n" +
" \"remove_duplicated_term\": true\n" +
" }\n" +
" }\n" +
" }\n" +
" },\n" +
" \"mappings\": {\n" +
" \"properties\": {\n" +
" \"id\": {\n" +
" \"type\": \"keyword\"\n" +
" },\n" +
" \"name\": {\n" +
" \"type\": \"completion\",\n" +
" \"analyzer\": \"my_pinyin\",\n" +
" \"search_analyzer\": \"ik_smart\"\n" +
" },\n" +
" \"title\":{\n" +
" \"type\": \"text\",\n" +
" \"analyzer\": \"my_pinyin\",\n" +
" \"search_analyzer\": \"ik_smart\"\n" +
" },\n" +
" \"price\":{\n" +
" \"type\": \"long\"\n" +
" }\n" +
" }\n" +
" }\n" +
"}", XContentType.JSON);
CreateIndexResponse response = client.indices().create(request, RequestOptions.DEFAULT);
System.out.println("response = " + response.isAcknowledged());
}
|
返回结果:
2.3.导入文档数据
示例代码:
1
2
3
4
5
6
7
8
9
10
11
12
13
14
15
16
17
18
19
20
21
22
| @Test
public void testBulkDocument() throws IOException {
List<Goods> list = new ArrayList<>();
list.add(new Goods(1L, "红米9", "红米9手机 数码", 1499L));
list.add(new Goods(2L, "三星 Galaxy A90", "三星 Galaxy A90 手机 数码 疾速5G 骁龙855", 3099L));
list.add(new Goods(3L, "Sony WH-1000XM3", "Sony WH-1000XM3 降噪耳机 数码", 2299L));
list.add(new Goods(4L, "松下剃须刀", "松下电动剃须刀高转速磁悬浮马达", 599L));
BulkRequest bulkRequest = new BulkRequest();
for (Goods goods : list) {
bulkRequest.add(new IndexRequest("goods")
.id(goods.getId().toString())
.source(JSON.toJSONString(goods), XContentType.JSON)
);
}
BulkResponse bulkResponse = client.bulk(bulkRequest, RequestOptions.DEFAULT);
System.out.println("status: " + bulkResponse.status());
}
|
2.4.基本查询
代码如下:
1
2
3
4
5
6
7
8
9
10
11
12
13
14
15
16
17
18
19
20
21
22
23
24
25
26
27
28
29
30
31
32
33
34
35
36
37
38
39
40
41
42
43
44
45
46
47
48
49
50
51
52
53
54
55
56
57
58
59
60
| @Test
public void testBasicSearchWithSortAndPage() throws IOException, InvocationTargetException, IllegalAccessException {
SearchSourceBuilder sourceBuilder = new SearchSourceBuilder();
sourceBuilder.fetchSource(new String[0], new String[]{"name"});
BoolQueryBuilder boolQueryBuilder = QueryBuilders.boolQuery();
boolQueryBuilder.must(QueryBuilders.matchQuery("title", "数码"));
boolQueryBuilder.filter(QueryBuilders.rangeQuery("price").lte(3000));
sourceBuilder.query(boolQueryBuilder);
sourceBuilder.sort("price", SortOrder.ASC);
int page = 1, size = 5;
int from = (page - 1) * size;
sourceBuilder.from(from);
sourceBuilder.size(size);
sourceBuilder.highlighter(new HighlightBuilder().field("title"));
SearchRequest request = new SearchRequest("goods");
request.source(sourceBuilder);
SearchResponse response = client.search(request, RequestOptions.DEFAULT);
SearchHits searchHits = response.getHits();
long total = searchHits.getTotalHits().value;
System.out.println("total = " + total);
SearchHit[] hits = searchHits.getHits();
for (SearchHit hit : hits) {
String json = hit.getSourceAsString();
Goods goods = JSON.parseObject(json, Goods.class);
Map<String, HighlightField> highlightFields = hit.getHighlightFields();
for (HighlightField field : highlightFields.values()) {
String fieldName = field.getName();
String fieldValue = StringUtils.join(field.getFragments());
BeanUtils.setProperty(goods, fieldName, fieldValue);
}
System.out.println("goods = " + goods);
}
}
|
其中的 BeanUtils用到了一个依赖:
1
2
3
4
5
| <dependency>
<groupId>commons-beanutils</groupId>
<artifactId>commons-beanutils</artifactId>
<version>1.9.3</version>
</dependency>
|
2.5.Suggest查询
这里以Completion Suggest查询为例:
1
2
3
4
5
6
7
8
9
10
11
12
13
14
15
16
17
18
19
20
21
22
23
24
25
26
27
28
29
30
31
32
33
34
35
36
37
38
39
40
41
42
43
44
45
46
|
@Test
public void testSuggest() throws IOException {
SearchSourceBuilder searchSourceBuilder = new SearchSourceBuilder();
SuggestBuilder suggestBuilder = new SuggestBuilder();
suggestBuilder.addSuggestion("name_suggest",
SuggestBuilders.completionSuggestion("name").prefix("s").size(30));
searchSourceBuilder.suggest(suggestBuilder);
SearchRequest request = new SearchRequest("goods");
request.source(searchSourceBuilder);
SearchResponse response = client.search(request, RequestOptions.DEFAULT);
Suggest suggest = response.getSuggest();
Suggest.Suggestion<? extends Suggest.Suggestion.Entry<? extends Suggest.Suggestion.Entry.Option>> nameSuggest =
suggest.getSuggestion("name_suggest");
nameSuggest.forEach(suggestion -> {
List<? extends Suggest.Suggestion.Entry.Option> options = suggestion.getOptions();
System.out.println("补全的结果如下: ");
for (Suggest.Suggestion.Entry.Option option : options) {
Text text = option.getText();
System.out.println("\t" + text);
}
});
}
|
结果:
2.6.异步API
之前我们使用的API都是同步阻塞调用的,也就是说调用api时,除非ES返回结果,否则代码就一直阻塞。
当然,ES也提供了异步调用的API,利用回调函数来处理执行结果。其底层是异步的Http请求,并且将执行结果用Future<T>来封装。
因此我们在发出请求后,无需等待结果,而是去执行其它业务。当ES服务端返回结果时再去处理,可以提高CPU的利用率,减少不必要的等待时间。
异步API与同步API从调用来看,最大的区别是对结果的处理方式。其它如:创建请求、组织请求参数、发出请求等基本一致。
2.6.1.异步新增
代码如下:
1
2
3
4
5
6
7
8
9
10
11
12
13
14
15
16
17
18
19
20
21
22
23
24
25
26
27
28
29
30
31
32
33
34
35
| @Test
public void testAsyncAddDocument() throws InterruptedException {
Goods goods = new Goods(5L, "松下电吹风", "松下电吹风 网红电吹风", 1599L);
IndexRequest request = new IndexRequest("goods")
.id(goods.getId().toString())
.source(JSON.toJSONString(goods), XContentType.JSON);
client.indexAsync(request, RequestOptions.DEFAULT, new ActionListener<IndexResponse>() {
@Override
public void onResponse(IndexResponse indexResponse) {
System.out.println("我是成功的回调!" + indexResponse);
}
@Override
public void onFailure(Exception e) {
System.out.println("我是失败的回调!");
e.printStackTrace();
}
});
System.out.println("我的异步方法调用完成~~");
Thread.sleep(2000L);
}
|
结果:
1
2
| 我的异步方法调用完成~~
我是成功的回调!IndexResponse[index=goods,type=_doc,id=5,version=1,result=created,seqNo=29,primaryTerm=1,shards={"total":2,"successful":1,"failed":0}]
|
2.6.2.异步删除
代码如下:
1
2
3
4
5
6
7
8
9
10
11
12
13
14
15
16
17
18
19
20
21
22
23
24
25
26
27
28
29
30
| @Test
public void testAsyncDeleteDocument() throws InterruptedException {
DeleteRequest request = new DeleteRequest("goods", "5");
client.deleteAsync(request, RequestOptions.DEFAULT, new ActionListener<DeleteResponse>() {
@Override
public void onResponse(DeleteResponse indexResponse) {
System.out.println("我是成功的回调!" + indexResponse);
}
@Override
public void onFailure(Exception e) {
System.out.println("我是失败的回调!");
e.printStackTrace();
}
});
System.out.println("我的异步方法调用完成~~");
Thread.sleep(2000L);
}
|
执行结果:
1
2
| 我的异步方法调用完成~~
我是成功的回调!DeleteResponse[index=goods,type=_doc,id=5,version=1,result=not_found,shards=ShardInfo{total=2, successful=1, failures=[]}]
|
2.6.3.异步查询
这里演示一个异步的模板查询:
1
2
3
4
5
6
7
8
9
10
11
12
13
14
15
16
17
18
19
20
21
22
23
24
25
26
27
28
29
| @Test
public void testGetDocumentByIdAsync() throws IOException, InterruptedException {
System.out.println("准备开始查询");
GetRequest request = new GetRequest("goods", "1");
client.getAsync(request, RequestOptions.DEFAULT, new ActionListener<GetResponse>() {
@Override
public void onResponse(GetResponse response) {
String json = response.getSourceAsString();
Goods goods = JSON.parseObject(json, Goods.class);
System.out.println("查询结束,得到结果: " + goods);
}
@Override
public void onFailure(Exception e) {
e.printStackTrace();
}
});
System.out.println("请求已经发出,等待执行结果!");
Thread.sleep(2000);
}
|
执行结果:
1
2
3
4
5
6
| 我的异步方法调用完成~~
我是成功的回调!
推荐结果如下:
Sony WH-1000XM3
三星 Galaxy A90
松下剃须刀
|